How to Measure for Sliding Wardrobe Doors: Step-by-Step
Accurate measurements are critical for perfectly fitting sliding wardrobe doors. Even small errors can lead to gaps, operational issues, or expensive remakes. This professional guide ensures you measure correctly the first time, whether for a DIY project or providing dimensions to suppliers.
Having installed thousands of custom sliding doors across Johannesburg, Pretoria, and East Rand, Mirror Robe has developed foolproof measurement techniques. Follow this guide for professional-quality results.
Why Accurate Measurements Matter
Consequences of Measurement Errors
Too Small:
- Gaps around doors
- Light leaks
- Reduced privacy
- Unprofessional appearance
- May require complete remake
Too Large:
- Doors won't fit opening
- Binding during operation
- Installation impossible
- Expensive rectification
- Wasted time and money
Uneven:
- Doors won't close properly
- Operational issues
- Visible gaps
- Professional adjustment needed
Professional Measurement Benefits
- Perfect fit guaranteed
- Smooth operation
- Professional appearance
- No gaps or light leaks
- Optimal functionality
- Manufacturer warranties protected
Essential Measurement Tools
Required Equipment
Must-Have:
- Steel tape measure (5m+ length)
- Pencil and paper
- Calculator
- Level (spirit level, 1m+)
- Straightedge or long ruler
Helpful:
- Laser measure (for accuracy)
- Stepladder (for height)
- Assistant (makes measuring easier)
- Camera (document measurements)
Cost for Basic Kit: R300 - R800
Tool Quality Matters
Steel Tape Measure:
- Fabric tapes stretch (inaccurate)
- Steel maintains accuracy
- Locking mechanism essential
- Metric measurements (mm)
Level:
- Check walls and floor
- Ensure accurate assessment
- Critical for installation success
Pre-Measurement Preparation
Clear the Area
Remove:
- Furniture near wardrobe
- Items from wardrobe interior
- Existing doors (if replacement)
- Any obstructions
Purpose:
- Accurate measurements
- Safety
- Proper access to opening
- Identify potential issues
Assess the Opening
Check For:
Squareness:
- Are corners 90 degrees?
- Is opening rectangular?
- Any visible deviation?
Level:
- Is floor level?
- Is ceiling level?
- Wall plumb (vertical)?
Obstructions:
- Baseboards
- Crown molding
- Light switches
- Power outlets
- Pipes or ducts
Wall Condition:
- Solid walls?
- Sufficient mounting surface?
- Need reinforcement?
Standard Measurement Process
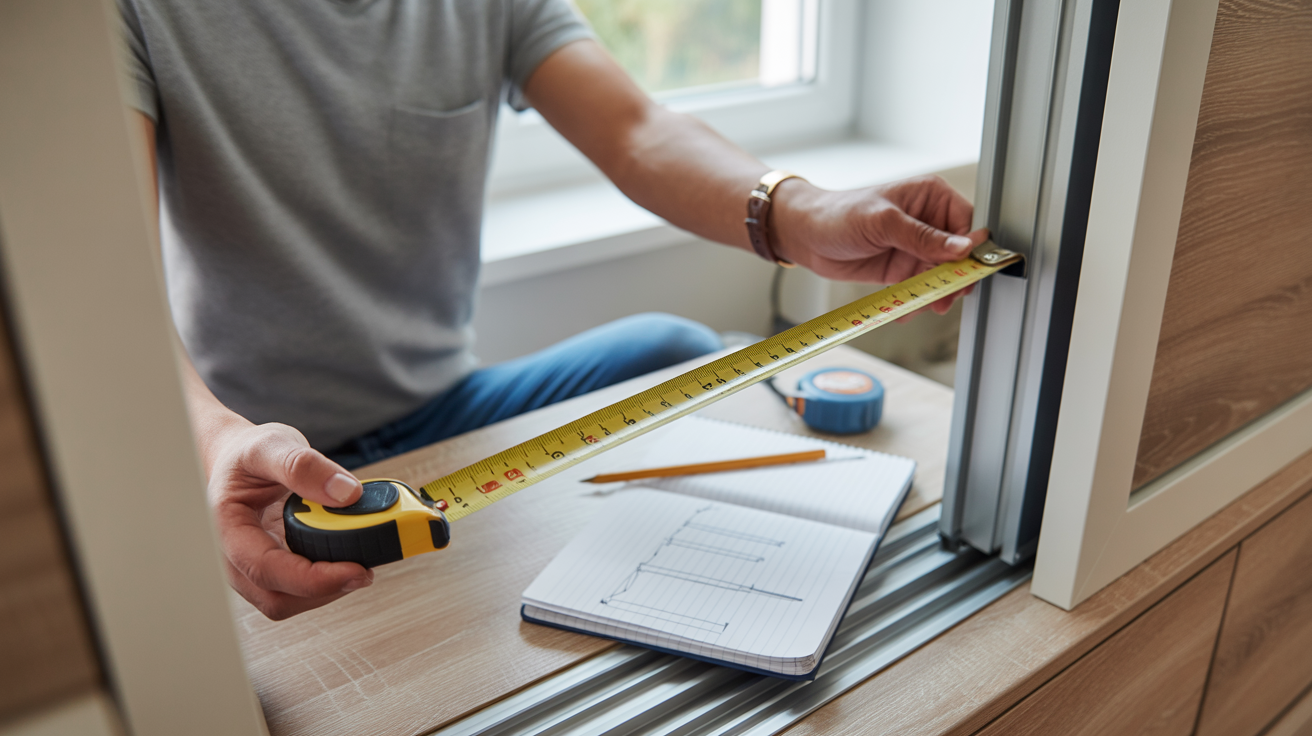
Step 1: Width Measurements
Take THREE Width Measurements:
Top Width:
- Measure across opening at ceiling level
- From inside edge to inside edge
- Record in millimeters
- Example: 2,845mm
Middle Width:
- Measure at mid-height (approximately 1.2m from floor)
- Inside edge to inside edge
- Record in millimeters
- Example: 2,850mm
Bottom Width:
- Measure at floor level
- Inside edge to inside edge
- Record in millimeters
- Example: 2,852mm
Critical:
- Use the smallest width measurement
- This ensures doors fit throughout height
- Ignoring this causes binding
Example Calculation:
- Top: 2,845mm
- Middle: 2,850mm
- Bottom: 2,852mm
- Use: 2,845mm (smallest)
Step 2: Height Measurements
Take THREE Height Measurements:
Left Side Height:
- Measure from floor to ceiling/soffit
- Along left side of opening
- Record in millimeters
- Example: 2,410mm
Center Height:
- Measure at center of opening
- Floor to ceiling
- Record in millimeters
- Example: 2,405mm
Right Side Height:
- Measure along right side
- Floor to ceiling
- Record in millimeters
- Example: 2,408mm
Critical:
- Use the smallest height measurement
- Prevents doors hitting ceiling
- Essential for proper fit
Example Calculation:
- Left: 2,410mm
- Center: 2,405mm
- Right: 2,408mm
- Use: 2,405mm (smallest)
Step 3: Depth Measurements
Measure Depth:
Why It Matters:
- Ensures adequate space for tracks
- Door panels need clearance
- Hardware requirements
- Installation space
What to Measure:
- Depth of wardrobe opening
- From front edge to back wall
- Minimum depth: 550mm recommended
- Record measurement
Typical Depths:
- Standard wardrobe: 600mm
- Walk-in wardrobe: 1,200mm+
- Shallow wardrobe: 450-550mm (special consideration)
Step 4: Document Everything
Measurement Worksheet:
Opening Dimensions:
-
Top width: ______mm
-
Middle width: ______mm
-
Bottom width: ______mm
-
Working width: ______mm (smallest)
-
Left height: ______mm
-
Center height: ______mm
-
Right height: ______mm
-
Working height: ______mm (smallest)
-
Depth: ______mm
Obstructions/Notes:
- Baseboard height: ______mm
- Crown molding depth: ______mm
- Light switches: Location
- Any irregularities: Notes
Photos:
- Overall opening
- Corners
- Obstructions
- Existing conditions
Special Measurement Considerations
Uneven Floors
Problem:
- Sloped or uneven floors common
- Affects door operation
- Creates gaps
Solution:
- Measure from highest point of floor
- Note floor variation
- Adjustable bottom guides compensate
- May need floor leveling
Acceptable Variation: Up to 10mm Beyond 10mm: Leveling recommended
Uneven Ceilings
Issue:
- Ceilings rarely perfectly level
- Affects top mounting
Approach:
- Use lowest ceiling point
- Note variations
- Installer will accommodate
- Top track can follow ceiling
Protruding Baseboards
Common Scenario:
- Baseboard extends into opening
- Reduces effective width
Measurement:
- Measure to face of baseboard
- Not behind baseboard
- Record baseboard height
- May affect bottom track placement
Options:
- Notch baseboard
- Install over baseboard
- Remove baseboard section
Angled Ceilings
Sloped Ceilings:
- Attic rooms
- Cathedral ceilings
- Under stairs
Special Measurement:
- Measure at multiple points
- Document slope
- Professional consultation recommended
- Custom solutions may be needed
Existing Door Frames
If Replacing:
- Remove existing doors first
- Measure frame interior
- Check frame condition
- May reuse or replace frame
If Keeping Frame:
- Measure within frame
- Account for frame thickness
- Check frame square and level
- Ensure frame structurally sound
Common Measurement Mistakes
Mistake #1: Using Only One Measurement
Error:
- Single width measurement
- Single height measurement
- Assumes opening perfectly square
Problem:
- Misses variations
- Causes fit issues
- Professional wouldn't do this
Solution:
- Always three measurements per dimension
- Use smallest for working dimension
Mistake #2: Measuring from Outside Edge
Error:
- Measuring exterior to exterior
- Including frame thickness
- Assuming frame continues throughout
Problem:
- Doors too large
- Won't fit in opening
Solution:
- Always measure inside to inside
- Actual opening space
Mistake #3: Rounding Measurements
Error:
- Rounding to nearest centimeter
- "About" measurements
- Imprecise recording
Problem:
- Millimeters matter
- Accumulates to significant error
- Professional fit impossible
Solution:
- Record exact millimeters
- No rounding
- Precise documentation
Mistake #4: Not Checking Level/Square
Error:
- Assuming opening is square
- Not checking floor level
- Ignoring wall plumb
Problem:
- Doesn't account for irregularities
- Installation issues arise
- Doors may not operate properly
Solution:
- Use level to check
- Document variations
- Inform supplier/installer
Mistake #5: Forgetting Obstructions
Error:
- Not noting light switches
- Ignoring power outlets
- Forgetting baseboards
Problem:
- Installation conflicts
- Last-minute modifications needed
- Delays and extra costs
Solution:
- Document all obstructions
- Photograph everything
- Detailed notes
Professional vs. DIY Measurement
When DIY Measurement Sufficient
Appropriate For:
- Standard rectangular opening
- Level floors and ceiling
- No unusual features
- You're confident with tools
- Supplier provides guidance
When Professional Measurement Essential
Call Professionals For:
- Irregular openings
- Significant floor/ceiling slopes
- Very large or complex installations
- Walk-in wardrobes
- Valuable custom doors
- Uncertain about any aspect
Professional Benefits:
- Accurate to ±1mm
- Experience with problem situations
- Manufacturer warranty protection
- Installation guaranteed
- Peace of mind
Mirror Robe Free Measurement:
- On-site professional measurement
- No obligation
- Expert assessment
- Accurate quote
- Johannesburg, Pretoria, East Rand
After Measurement: What's Next?
Review Your Measurements
Double-Check:
- All measurements in millimeters
- Working dimensions identified
- Obstructions noted
- Photos taken
Calculate Door Configurations
Common Configurations:
2-Door System:
- Each door = (width ÷ 2) + overlap
- Standard overlap: 50-75mm
- Example: 2,800mm opening = 1,437.5mm per door
3-Door System:
- Each door = (width ÷ 3) + overlap
- Typical configuration for 2,400-3,600mm openings
4-Door System:
- Each door = (width ÷ 4) + overlap
- Used for wider openings (3,600mm+)
Note: Let supplier calculate exact door sizes - overlap and clearances vary by system
Provide to Supplier
Information to Include:
- Working width (smallest)
- Working height (smallest)
- Depth
- Number of doors desired
- Frame material preference
- Panel material choice (mirror, wood, glass)
- Handle preference
- Any special requirements
- Photos of opening
- Obstruction details
Measurement Checklist
Before You Start:
- ☐ Tools gathered
- ☐ Area cleared
- ☐ Assistant available (helpful)
- ☐ Worksheet prepared
During Measurement:
- ☐ Three width measurements taken
- ☐ Three height measurements taken
- ☐ Depth measured
- ☐ Level checked
- ☐ Obstructions documented
- ☐ Photos taken
- ☐ Notes detailed
After Measurement:
- ☐ Working dimensions identified
- ☐ All data recorded clearly
- ☐ Double-checked measurements
- ☐ Ready for supplier
Get Professional Help
Confident measuring is crucial, but professional expertise guarantees perfect results. Call Mirror Robe at 082 464 8023 for free professional measurement service.
Our measurement service includes:
- On-site professional assessment
- Precise measurements to ±1mm
- Problem identification and solutions
- Expert recommendations
- Accurate quote
- No obligation
Serving Johannesburg, Pretoria, and East Rand since 1997.
Don't risk expensive mistakes—let our professionals ensure your sliding doors fit perfectly. Contact us today for your free measurement service.
Ready to Transform Your Space?
Contact Mirror Robe today for expert advice and a free consultation. Our team is ready to help you create the perfect sliding door solution for your Gauteng home.
Call 082 464 8023